Footprint marks on sandals are one of those tiny frustrations that make your favorite pair look worn out fast. Whether the marks are darkened from sweat and dirt or depressed impressions left in foam footbeds, there’s a simple trick that can refresh them and make them look brand new again.
Below you’ll find a quick explanation of why footprint marks appear and a reliable, safe step-by-step method to remove them, plus material-specific tips and prevention ideas.
Why footprint marks appear
Footprint marks usually come from three things:
- Oils and sweat from your skin that darken or stain the footbed.
- Dirt and dust that collect where your foot contacts the sandal.
- Compression in soft materials (EVA foam, memory foam) where your weight leaves an impression.
Different materials react differently, so cleaning and repair approaches vary depending on whether your sandals are rubber, foam, leather, or suede.
The simple trick: clean, heat, and press
This three-step approach works for most casual sandals (rubber, EVA foam, synthetic footbeds). It removes surface stains and helps the footbed regain its original shape.
Materials needed:
- Mild liquid soap or dish soap
- Warm water
- Soft cloth or microfiber towel
- Soft toothbrush
- Baking soda (optional)
- Hairdryer (on medium heat) or warm sunlight
- A flat board (cutting board, heavy book, or baking sheet)
- Weights (books, cans)
Step-by-step:
Clean the surface
- Mix a few drops of mild soap in warm water.
- Dip the cloth or toothbrush and gently scrub the footbed, focusing on darker footprint areas.
- For stubborn grime, make a paste of baking soda and water, apply with a toothbrush, and scrub lightly.
- Rinse with a damp cloth to remove soap and residue.
Dry and warm the footbed
- Let the sandals air-dry until only slightly damp.
- Use a hairdryer on medium heat to warm the footbed for 30–60 seconds. Keep the dryer moving and hold it about 6–8 inches away; don’t overheat.
- If you prefer a no-heat option, place the sandals in direct, gentle sunlight for 20–30 minutes.
Press flat while warm
- Immediately place a flat board over the warmed footbeds.
- Put weights (books or cans) evenly on top to apply firm, uniform pressure.
- Leave for 30–60 minutes, then remove and let cool completely.
- Repeat if needed. The heat softens the foam slightly, and pressing helps the material recover a flatter, more even surface.
This method cleans stains and reduces or eliminates impressions without harsh chemicals or complicated tools.
Tips by material
- Rubber/synthetic: The cleaning + hairdryer + press method works well. Magic Eraser or a melamine sponge can remove scuffs and marks—test a small area first.
- EVA or memory foam: Be cautious with heat. Use the hairdryer at low to medium and shorter intervals. Avoid boiling water or ovens.
- Leather: Don’t use heat. Clean with a leather cleaner or saddle soap, then condition. For impressions, a leather-specific stretcher or professional cobbler is better.
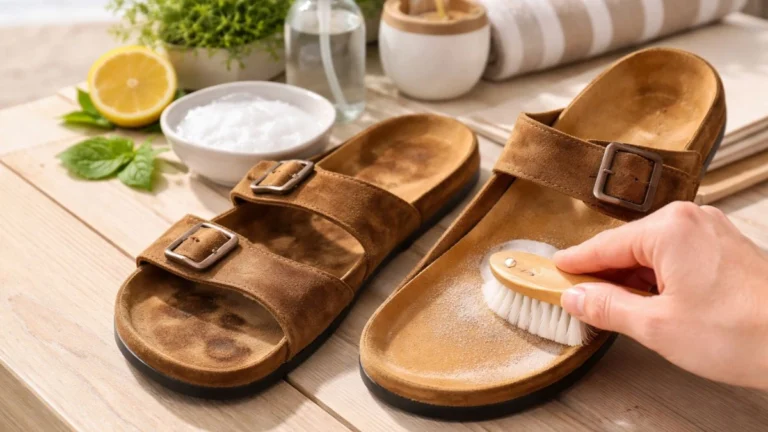
- Suede: Use a suede brush and eraser blocks. Avoid liquid cleaners and direct heat.
Prevention and upkeep
- Wipe sandals after each use with a damp cloth to prevent buildup.
- Sprinkle a little foot powder or cornstarch on your feet before wearing to reduce sweat transfer.
- Rotate sandals to give materials time to return to shape.
- Use removable insoles you can wash or replace to protect the footbed.
- Store sandals flat, not crushed under heavier footwear.
When to seek professional help
If your sandals are expensive leather, orthotic, or glued constructions, or the impressions are deep and persistent, consider taking them to a cobbler or shoe repair shop. Professional cleaning and reconditioning can save high-value shoes.
Final thoughts
Goodbye footprint marks on sandals: the simple trick that makes them look brand new is essentially a three-step routine—clean, warm, and press. It’s quick, inexpensive, and effective for most casual sandals, restoring appearance and extending life. With a little regular care and a gentle press now and then, your sandals can stay fresh and comfortable for many more steps.